9.1. Creating and Editing Aliases
The easiest way to create and alter aliases is from the World Editor, the place where all settings of a World are altered (see Chapter 4, Editing a World).
Aliases are defined in the Aliases section inside the Automation section. When you open that section, you'll see a list of the defined aliases and some buttons like this:
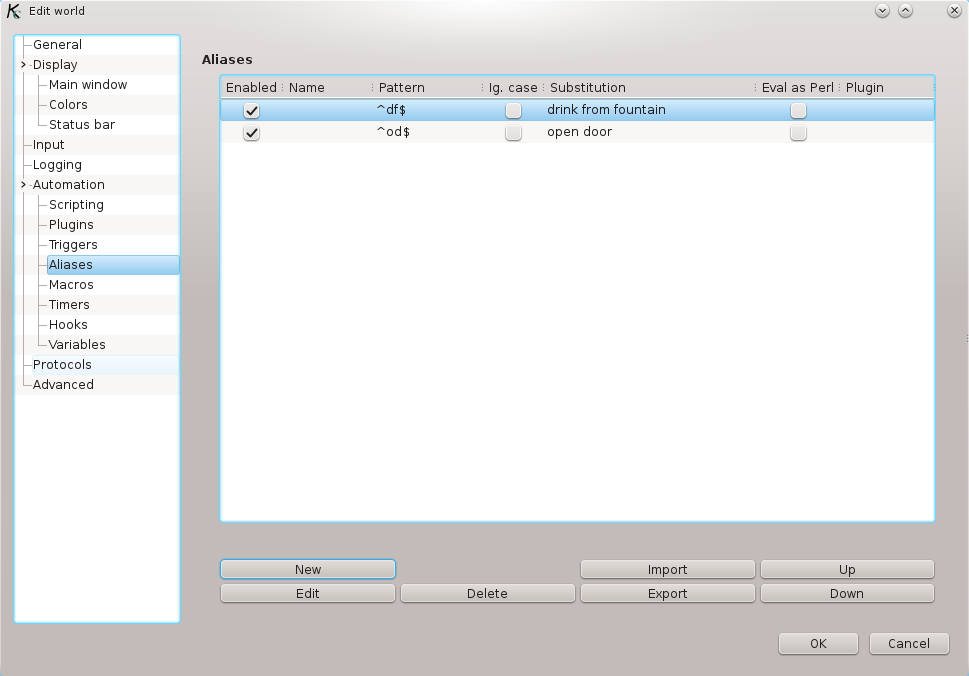
The main part of the window is the list of defined aliases. The columns are as follows:
Enabled specifies whether the alias is enabled or not. Aliases that are not enabled are not active and will not be tried when a command is entered, but they remain in the list so that they can later be enabled again.
Name is a name that is assigned to an alias. This helps you identify the alias' purpose and is useful when editing an alias via the command line (as described in Section 9.3.1, “Editing Aliases”). Assigning a name to an alias is optional.
Pattern and Substitution are the parameters for the alias, and they define the alias' action, as described above.
I Case (for "Ignore Case"), if set, means the case is not considered while matching the pattern, that is, a case-insensitive match is done.
Eval as Perl controls how the alias is evaluated. This option will be described later.
Plugin: if this is non-empty, it means that the alias belongs to a plugin (and the name of the plugin is displayed). However, by default plugin aliases are not displayed. See Section 4.7, “Advanced” for information on how to display plugin aliases here.
9.1.1. Adding Aliases
To add a new alias, press the Add button. This will open a window for you to edit the new alias' parameters:
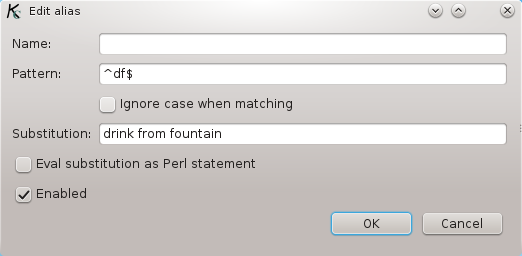
What can be set represents the columns described above. The only
thing that needs explanation is the Eval Substitution as
Perl statement option, corresponding to the Eval
as Perl column. As mentioned before, aliases are actually a
substitution, using Perl's s// construct. It is
also possible to have aliases that use a s//e
construct, that is, whose substitution is actually composed of Perl
statements evaluated when a match is found. When that option is
enabled, the substitution is evaluated as a Perl statement.
When you are finished, press OK and the alias will be added. If you change your mind, press Cancel and the alias will not be added.
9.1.2. Editing Aliases
To edit an alias, select it by clicking its line in the list (the line will be highlighted), and press the Edit button. A window like the one used for adding aliases (see Section 9.1.1, “Adding Aliases”) will be opened, filled with the alias' parameters. Change what you want, and press the OK to commit the changes. If, however, you change you mind, press Cancel and the changes will be not be made, the alias will remain as it was before.
Another shorter way to edit an alias is to double click its line in the list.
It is also possible to change the value of the Enabled and Eval as Perl flags directly from the alias list. Make sure that the alias you want to change is selected, and click in the check button. The state will be toggled.
To delete an alias, select it and press the Delete button. You will be asked for confirmation, and can cancel the operation, but once deleted, you cannot recover the alias. If you want, you can disable this confirmation dialog, but if you do so and click the Delete button, the only way to undo your action will be creating the alias again. See Section 4.7, “Advanced”. To delete several aliases at once, select them all and press Delete.
The final thing that needs to be explained with regard to aliases is how to reorder them. Aliases as tried from the first one to the last, so in a few cases the order might matter. To move an alias up or down in the list, select it and press the corresponding button.